
Salads
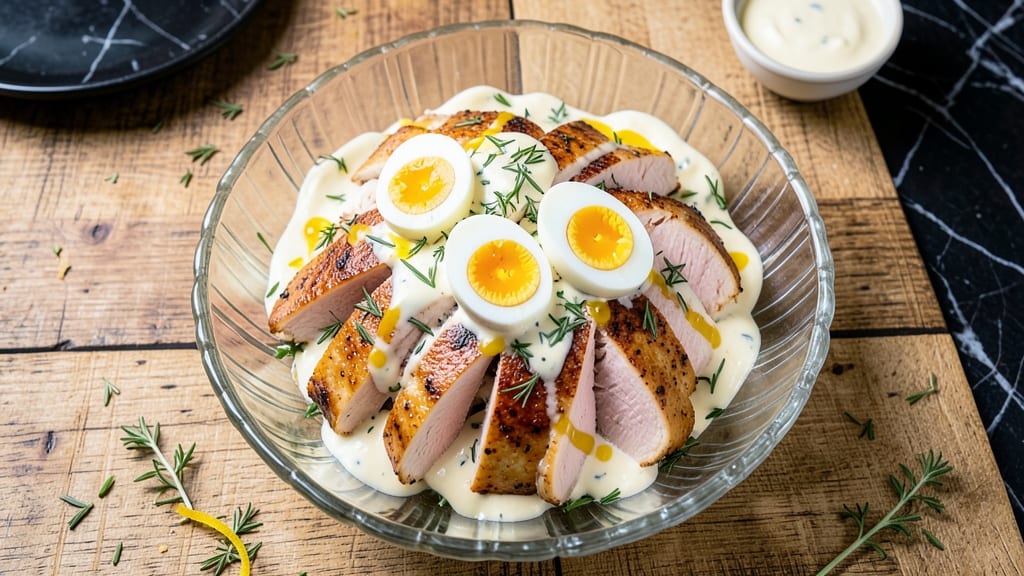
This Egg Harbor Chicken Salad transforms simple ingredients into a restaurant-worthy dish with crispy tortilla cups and herbed yolk magic. I developed this recipe after years of perfecting chicken salad techniques that deliver both texture and flavor—no soggy lettuce or bland chicken here.
The secret lies in properly cooking the chicken and using a mayo-based dressing infused with fresh herbs and a touch of mustard for depth.
What sets this recipe apart is the crispy tortilla cups, which add a satisfying crunch that balances the creamy chicken mixture. I use boneless, skinless chicken breasts for consistent results, seasoned simply with salt and pepper before cooking to a perfect 165°F—never dry or overcooked.
The tortillas get a quick toast in the oven to lock in that crispy texture while keeping the interior soft.
By the time you're done, you'll have a salad that's creamy yet light, packed with tender chicken, fresh herbs, and the bright pop of hard-boiled egg yolks mixed right into the filling.
The tortilla cups hold everything together beautifully, making this dish perfect for lunches, picnics, or elegant gatherings. Every bite delivers that perfect balance of textures and flavors.
Serve with your favorite crackers or crusty bread for the full experience. This recipe scales easily for parties, and leftovers keep well in the fridge for up to three days. Let's get cooking!
Ingredients for egg harbor chicken salad
Crispy tortillas, herbed chicken, and creamy yolk magic—this salad packs restaurant flair with simple ingredients.
| Ingredient | Amount | Notes |
|---|---|---|
| Boneless, Skinless Chicken Breast 🍗 | 1 ½ lb | Cooked to 165°F, diced into bite-sized pieces |
| Large Eggs 🥚 | 4 whole | Hard-boiled, yolks separated and chopped |
| Mayonnaise 🥛 | ¾ cup | High-quality, full-fat preferred |
| Fresh Dill 🌿 | ¼ cup | Chopped finely, stems removed |
| Fresh Chives 🌱 | ¼ cup | Chopped finely, for bright flavor |
| Yellow Mustard 🟡 | 1 tbsp | For depth of flavor |
| Lemon Juice 🍋 | 1 tbsp | Freshly squeezed, for brightness |
| Kosher Salt 🧂 | 1 tsp | Diamond Crystal preferred |
| Ground Black Pepper 🌶️ | ½ tsp | Freshly ground for best flavor |
| Flour Tortillas 🌯 | 6 whole | Medium-sized, 10-inch preferred |
| Extra-Virgin Olive Oil 🫒 | 1 tbsp | For brushing tortillas |
| Celery Stalks 🧅 | 2 whole | Diced finely, for crunch |
| Red Grapes 🍇 | ½ cup | Seedless, halved for sweetness |
| Almonds 🥜 | ¼ cup | Sliced, toasted for crunch |
The chicken is the star, so don't skimp on quality. Look for boneless, skinless breasts with good marbling—they stay juicy when cooked to 165°F. I grab mine from Costco for the best price, but any grocery store's fresh chicken works. The tortillas? Mission brand is my go-to—they crisp up perfectly without tearing. If you can't find flour tortillas, corn tortillas toast just as well, though they'll be slightly sweeter. Fresh herbs make all the difference here—dill and chives should be bright green and fragrant, not wilted or yellowing.
No fresh dill? Dried dill at one-third the amount works in a pinch, but you'll lose that fresh pop. Subbing grapes? Diced apples or pears add sweetness, though they'll make the salad less vibrant. Almonds too pricey? Toasted walnuts or pecans give a similar crunch. The mayo is non-negotiable for creaminess—Duke's or Hellmann's are my top picks, but any full-fat mayo works. Want extra richness? Mix in 1 tbsp sour cream with the mayo. The lemon juice is key—Meyer lemons add subtle sweetness if you can find them.
This salad keeps beautifully for 3 days in the fridge, though the tortillas get softer. Store the filling and tortillas separately—assemble just before serving for that perfect crunch. Double the tortillas if you're feeding a crowd, but make the filling fresh. The hard-boiled eggs stay good for 5 days in the shell, but peel and chop them right before mixing. For a party, pre-chop all ingredients and store in airtight containers—just mix everything together when ready to serve.
Why You'll Love This Recipe
- No-Fuss Assembly: I swear by this recipe because it’s the kind of dish where you can chop while watching TV—just dice the chicken, hard-boil those eggs (or grab pre-boiled if you’re really lazy), and toss everything with mayo, dill, and chives. No fancy techniques, just good stuff coming together.
- Herb-Packed Punch: That bright dill and chives? They turn this salad into something special—fresh, tangy, and just salty enough from the chicken. Honestly, the flavor feels luxurious without needing fancy ingredients, and the eggs add that creamy contrast that keeps me coming back.
- Lunchbox Hero: Between us, this is my go-to for work lunches or picnics—pack it in a jar, and it stays fresh for days. The texture holds up, and the taste? Still hits the spot even after a long day. (Yes, even on a Tuesday night.)
- Budget-Friendly Protein: Chicken breast and eggs are cheap, and mayo stretches far. I make a big batch on Sundays, and it feeds my family all week—no takeout, no stress. Plus, the leftovers? Just as good cold as they are fresh.
Step-by-step instructions for egg harbor chicken salad recipe
Here's how to create perfectly crispy tortilla cups filled with herbed chicken salad and creamy yolk magic.
Cook and Dice the Chicken Breast
Begin by cooking the 1.5 lb boneless, skinless chicken breast to an internal temperature of 165°F. I like to season it generously with 1 tsp kosher salt and 0.5 tsp ground black pepper before cooking—this ensures flavor penetration. You can grill, bake at 375°F for 25-30 minutes, or poach in simmering water for 12-15 minutes until fully cooked.
Once cooked, let the chicken rest for 10 minutes before dicing into bite-sized pieces—this prevents the meat from shrinking or drying out. The chicken should be tender but still hold its shape when cut. If it feels too dry, toss it with 1 tbsp lemon juice to add moisture and brightness.
Prepare the Herbed Yolk Mixture
Hard-boil the 4 whole large eggs by placing them in boiling water for 9 minutes, then transfer to an ice bath for 5 minutes to stop the cooking process. Once cooled, peel the eggs and separate the yolks from the whites. Chop the yolks finely—you'll want them small enough to blend seamlessly into the salad.
In a medium bowl, combine the chopped yolks with 0.75 cup mayonnaise, 0.25 cup finely chopped fresh dill, 0.25 cup finely chopped fresh chives, 1 tbsp yellow mustard, and 1 tbsp lemon juice. Mix until fully incorporated—the herbs should be evenly distributed, and the mixture should be smooth and creamy. This is where the magic happens, so don't rush it.
Assemble the Chicken Salad
In a large mixing bowl, gently combine the diced chicken breast with the herbed yolk mixture. Fold in 2 whole celery stalks (finely diced), 0.5 cup halved red grapes, and 0.25 cup sliced almonds. The grapes add a touch of sweetness that balances the savory chicken, while the almonds provide a delightful crunch. Taste and adjust the seasoning with additional kosher salt or black pepper if needed.
Real talk: The salad should be moist but not soggy. If it feels too dry, add 1-2 tsp of lemon juice or a splash of water to loosen it up. The texture should be light and fluffy, with every bite bursting with flavor.
Create Crispy Tortilla Cups
Preheat your oven to 375°F. Cut each of the 6 whole flour tortillas in half to create 12 semicircles. Brush each semicircle lightly with 1 tbsp extra-virgin olive oil, focusing on the edges and the flat side. This step is crucial for achieving that perfect crispy texture—don't skip it!
Place the tortilla semicircles on a baking sheet, cut-side up. Press down gently on the flat side to create a shallow cup shape. Bake for 8-10 minutes until the edges are golden brown and crispy. Keep an eye on them—they crisp up quickly, and you don't want them to burn.
Fill and Serve
Once the tortilla cups are crispy, carefully fill each one with about 2 tablespoons of the chicken salad mixture. The cups should be generously filled but not overflowing—you want that crispy edge to stay intact. Garnish with additional chopped fresh dill or chives for a pop of color and freshness.
Serve immediately while the tortilla cups are still crispy. The contrast of the warm, crispy tortilla with the cool, creamy chicken salad is what makes this dish truly special. Pair with a simple green salad or some toasted bread for a complete meal that's sure to impress!
Pro Tips For Making Egg Harbor Chicken Salad
- POACH EGGS LOW AND SLOW: If you’re adding poached eggs to this salad, don’t rush them—simmer the water just below a gentle bubble, or they’ll turn into sad, rubbery blobs. I learned this the hard way after serving a batch where the whites were tougher than the chicken. A splash of vinegar in the water keeps them compact, but the real trick is patience—five minutes max, and they’ll hold together like they’re supposed to.
- SHRED CHICKEN WHILE STILL WARM: Cold chicken shreds like a stubborn mule, but warm chicken? It falls apart with a fork. Poach or boil your chicken breast, then let it rest for 10 minutes before shredding—this keeps the fibers tender. If you’re short on time, microwave it for 30 seconds first, but don’t overdo it or you’ll end up with dry, stringy bits.
- CHOP DILL AND CHIVES SMALL: Big chunks of dill or chives look lazy and taste like they’re fighting for space. Pulse them in a food processor for 2-3 seconds, then chop the rest by hand—this gives you that fine, even texture that makes the salad look (and taste) restaurant-worthy. Skip this, and you’ll regret it when the herbs just sit there like awkward guests.
- MIX MAYO WITH WET INGREDIENTS FIRST: Dumping mayo into dry shredded chicken is a recipe for clumping. Start by whisking the mayo with a splash of water, lemon juice, or even a little chicken broth—this emulsifies it better and keeps the salad creamy without turning it into a gluey mess. I was skeptical until I tried it, and now I won’t go back.
Storing and reheating your egg harbor chicken salad
Fridge Storage Tips
Store the chicken salad filling in an airtight container with a tight-fitting lid, pressing plastic wrap directly on the surface to prevent drying.
Keep it refrigerated at 40°F or below for up to 3 days—the tortilla cups should be stored separately in a separate airtight container or wrapped tightly in parchment paper to maintain crispness. I always label containers with the date to track freshness. 🥫
Freezer-Friendly Tricks
If you're prepping ahead for parties, freeze the chicken salad filling only in quart-sized freezer bags (leave 1 inch headspace for expansion). Thaw overnight in the fridge before assembling with tortilla cups.
The tortillas do not freeze well—they become soggy when reheated. For make-ahead convenience, I freeze the filling in individual portion-sized containers for easy grab-and-go lunches. ❄️
Reheating Tortilla Cups
To revive crispiness, place filled tortilla cups on a baking sheet and warm in a 350°F oven for 5-7 minutes until edges are golden again. For a quick fix, toast in a skillet over medium heat for 1-2 minutes per side—just watch closely to avoid burning.
Never microwave tortillas; they'll turn rubbery. The chicken salad filling can be gently reheated in the microwave for 30 seconds if needed, but I prefer stovetop warming for better texture. 🔥
Reviving Day-Old Tortillas
If your tortilla cups lost crispness overnight, brush them lightly with olive oil and reheat in a toaster oven at 375°F for 3-4 minutes until edges crisp up. For extra crunch, sprinkle with crushed cornflakes before reheating—they'll toast beautifully.
I've even revived stale tortillas by pressing them between parchment paper in a hot pan for 20 seconds per side. Don't toss them—just give them a second chance! 💫
Egg Safety Reminder
Hard-boiled eggs in the filling stay fresh for 5 days in the fridge, but always peel and chop them last before mixing. If you notice any yolks turning gray or whites developing a sour smell, discard them immediately—this is a classic sign of spoilage.
For extra safety, store peeled eggs in a separate container with a splash of cold water until ready to use. Trust me, this small step prevents foodborne surprises. 🚨
Portioning for Parties
For gatherings, divide the filling into individual serving containers (about ½ cup per person) and store with pre-crisped tortilla cups in a large insulated container. This keeps everything separate until serving.
I like using glass meal prep containers with compartments—they're easy to grab and serve straight from the fridge. Label with serving suggestions like "Add fresh herbs at the table" to guide your guests. 🍽️
Nutrition facts
Frequently asked questions
Can I use rotisserie chicken for this recipe?
Rotisserie chicken makes this recipe even easier. Just shred or dice the meat to bite-sized pieces and measure 1.5 lb total. Remove any skin or excess fat, then proceed with the recipe as written. The flavor will be slightly different but still delicious—just add an extra ½ tsp lemon juice to keep it bright.
What if I don't have fresh dill or chives?
No problem! For fresh dill, use ⅓ cup dried dill (it's more concentrated). For chives, substitute with 2 tbsp finely chopped green onion or 1 tbsp dried parsley. If you're missing both, try 1 tbsp dried tarragon for a similar herbaceous note. The salad will still taste great—just expect a slightly different flavor profile.
How do I keep the tortilla cups from getting soggy?
Prevent soggy tortillas by baking them just until crispy (golden brown edges, 8-10 minutes at 375°F) and filling them right before serving. For extra insurance, brush the insides with 1 tsp melted butter before adding filling. If making ahead, store filling and tortillas separately and assemble when ready to eat.
Can I make this salad ahead of time?
Yes! Prepare the filling 1 day ahead and store in an airtight container in the fridge. Toast the tortilla cups fresh 30 minutes before serving to maintain crispness. For parties, assemble the filled cups 2 hours ahead and keep them chilled—just reheat the tortillas briefly before serving. The flavors actually improve overnight!
What's the best way to serve this chicken salad?
This salad shines as a lunch main course or elegant appetizer. Serve with toasted baguette slices, water crackers, or buttered endive leaves for dipping. For a complete meal, pair with a simple green salad and crusty bread. It also makes a great picnic dish—just pack the filling and tortillas separately.